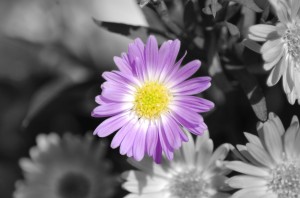
Selective colorization of a photo is one way to make the image truly unique. At first, I expected the process to be incredibly complicated and time consuming. As it turns out, it’s pretty straightforward and there are even multiple methods.
The easiest involves creating two layers for your photo, one color and one black and white. Then, you erase portions of either the b&w or the color photo. Additionally, if you use the gradient mapping method to convert your photo to black and white, the included layer mask (in PSE) could be used to exclude the effect.
About.com features a fantastic series explaining the various methods for partial color in a photo. There are also tutorials for PSE, PSP and GIMP on using the basic method I’ve described above! You might also want to check out the Selective Colorization Flickr Group for inspiration.
Have you used selective color? Share a photo or layout if you like!


I have not done selective coloring many times, but here is one layout I like myself.
http://www.godigitalscrapbooking.com/photopost/data/681/FWTS_Your_shoes.jpg
in this gallery
http://www.godigitalscrapbooking.com/photopost/showphoto.php?photo=39614&ppuser=1036