 Holly Blackwell is joining us this week for a three part series on her photo organization system. Holly is a wife, mom, and step-mom living in South Carolina. Her online home is chronicles of a southern scrapper.
Living in today’s digital age truly is an amazing thing, especially for those of us that love forms of memory keeping! But with all of the numerous advantages, also come some trials and struggles.
One of the most common issues that scrapbookers and photographers of today have is how to handle all of those pictures that we take! With no film and developing to pay for, we are able to shoot hundreds of snapshots instead of a mere 24. It can be thrilling when you get *the perfect shot*, but oh so overwhelming when you realize you now have 1,000 photos and no clue what to do with them!
Since converting to digital photography many years ago, I have struggled, planned, organized and revamped my system. Ultimately I have learned two very important things:
- your system must be flexible and will change over time
- the workload must be manageable in small increments of time.
With that being said, let’s dig into my process for managing digital photography.
Everything in its Place
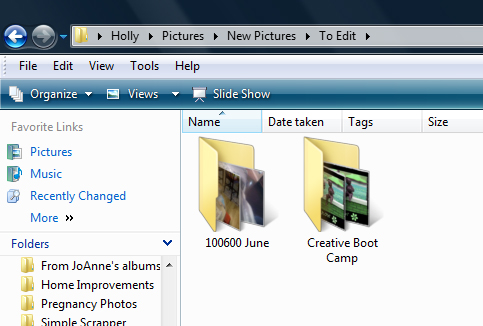
Everyone that takes digital photographs should have some sort of folder structure set up for their photos. The specific details of how this is designed really isn’t that important. The key is simply to have something that works for you. Within my Pictures folder, I have a To Edit folder, which is basically a home for anything that is a work in progress. In the screenshot above, you will see two folders. I have my current monthly folder, and a folder devoted to a current project.
Grab Those Memories
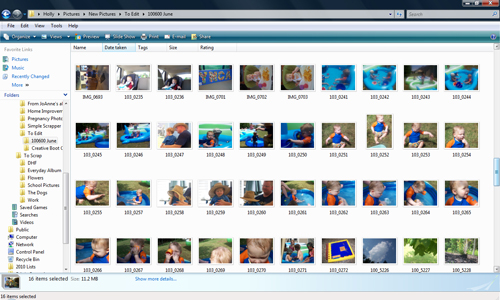
Once you have a structure in place to begin your photo process, it’s time to move photos from your cameras to your computer. I highly recommend doing this at least once a week. I found that I often got behind on transferring photos until I decided to set a specific day on which to do this activity. It is now part of my ritual to do this step on Sunday evenings. My weeks run from Monday through Sunday, but this can be adjusted to what makes the most sense to you. Though, some people feel a new week begins on Sunday, I like to keep a weekend’s activities together, rather than split between two weeks.
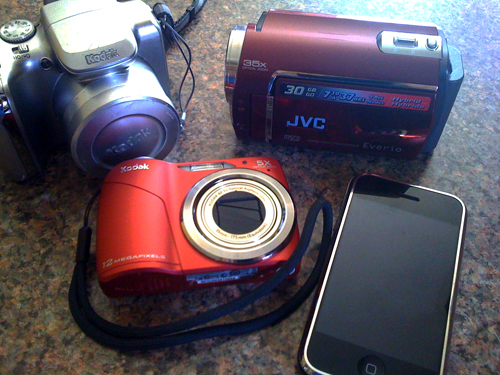
When doing this step, it is important to capture photos from all of your photo sources. In our home, we have two digital cameras, a video camera and two iPhones, so when I do an upload, I make sure to grab photos from all of these devices (if photos were taken during the past week). Once your transfer has been confirmed, you can delete the photos from your camera(s), if you choose.
If life is crazy and you have time for nothing else, DO THIS STEP.

Weed Out the Junk
As I mentioned earlier, today’s digital technology, combined with the love of photographs which most scrapbookers possess, can often result in an enormous (and overwhelming) amount of pictures. Many scrappers have a hard time accepting this, but the truth is that not all photos are worth keeping! (Yes, I actually put that in print!). At this point, you should scroll through your photos (relatively quickly) and delete the bad photos. YES, I said DELETE. That means they are gone forever. (See example above)
In every batch of photos you are going to have some that are so blurry they are useless, or a snapshot of the floor, or 15 pictures that are almost identical. The beauty of technology is that we can take 75 photos of our child in the sandbox in order to get that one *perfect* moment captured. That does not mean, however, that we need to keep all 75. Are you actually going to scrapbook, print or frame that many? No. So, weed out the ones you don’t need and only keep the ones that are of decent quality, help tell the story, or really speak to you. It may take some time to get used to this mentality, but ultimately, you will find it very liberating! And your hard drive will thank you.
By day Holly Blackwell is a Business Analyst, and by night she is a crafter and scrapbooker (both paper and digital). She also enjoys reading, writing, volunteering and making sure she has too many projects on her plate!
Don’t forget to subscribe to Simple Scrapper’s daily posts by RSS or email (in the sidebar) so that you don’t miss tomorrow’s installment from Holly!


Valuable information to have and to utilize. I have completed the beginning steps, now on to weeding out the junk. I will be back part 2. Thank you.
grambie – i’m so glad you are jumping on board and “playing along”. i promise, it’ll make things SO much easier and quicker for you!
just this morning i was able to complete one of the steps of my process before heading to work!
Really usefull post!
Thanks for sharing!
xoxo
Great info as always…looking forward to tomorrow’s post. Oh, in the picture you show as an example to “delete”…I know you can’t see the face of the kid in the picture, but I can tell just from the head…that is one cute kid:)…of course I am assuming that is my sweet little nephew C in the picture!
I am very impressed. This is a very practical way to handle lots of pictures. You do inspire me!
This article is amazing! I am absolutely inspired to add some of Holly’s organizational steps to my own system. I can’t wait to read parts 2 & 3.
for someone who always struggles with laptop memory(or lack of it)…i should really be ruthless and delete all the blurry pix crowding my folders! thank you for sharing…do holler when the next parts come out please!
hi there!
just wanted to let you know that parts 2 and 3 of the article are already available.
Part 2 here:
https://www.simplescrapper.com/2010/06/24/dealing-with-digital-overload-part-1-2/
Part 3 here:
https://www.simplescrapper.com/2010/06/25/dealing-with-digital-overload-part-2/
let me know if you have any questions after you read them !!
PS – if you are short on memory, you may want to consider storing some older photos on an External Hard Drive or even just flash drvies.