When winter rolls around it brings with it some obstacles for happy photographers like you and me, who want nothing more than to capture winter’s splendor at its finest. Not enough light, cool color casts and too rosy cheeks are just a few of the problems photographers can encounter.
Below are a few quick fixes that you can use in Photoshop to give your winter photos a leg up in these troublesome areas.
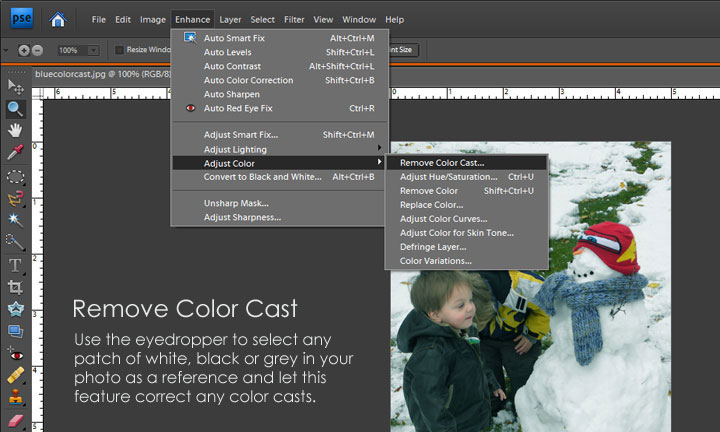
Kick the Blues
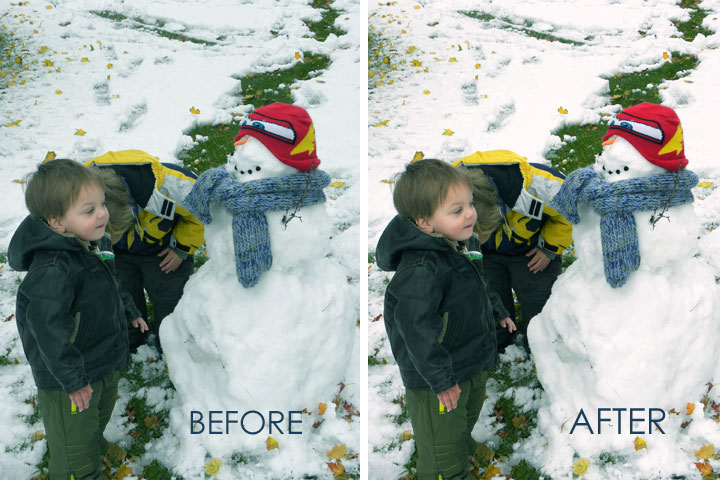
Due to the quality of light available during the winter months, our photos can often have blue or grayish casts, making snow look dingy and skin tones appear desaturated. Use Photoshop’s “Remove Color Cast” feature to rid your photo of these cool undertones.
A Note About Using Remove Color Cast:
When selecting a place to sample from with your eyedropper I most often will pick a patch of white if it is available to me, as this is the easiest color to tell whether it is in shadow or highlight. Try to choose a neutral patch that is neither shadowed or highlighted in your photo for the best results.
Lighten Up
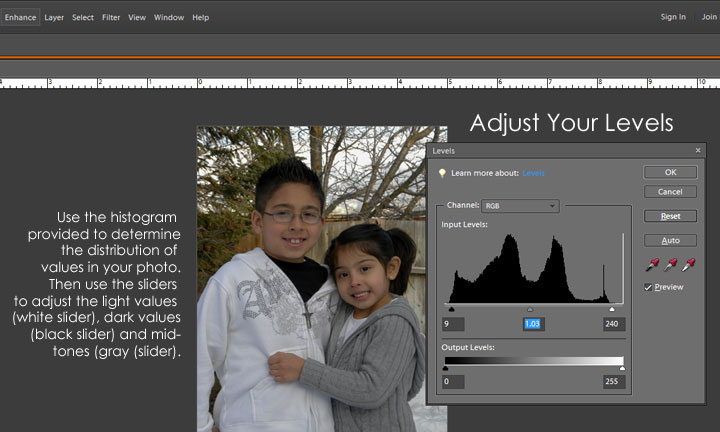
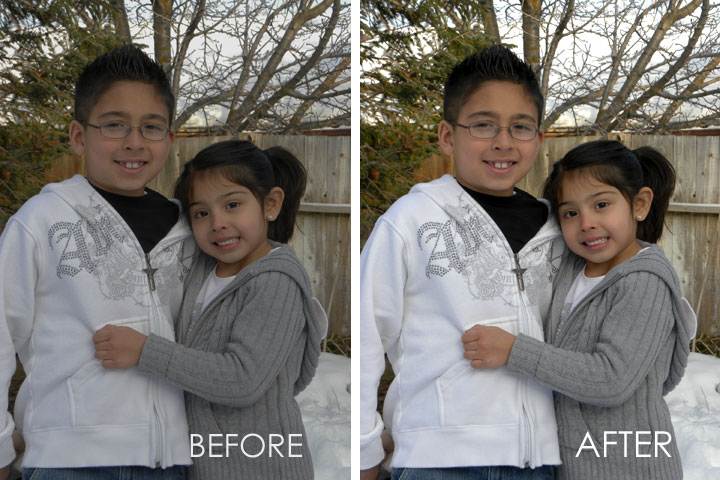
Underexposed photos are another unfortunate outcome in the dark days of Winter, often leading to dim, low-contrast shots. To brighten your day (and your photos) simply adjust your levels in Photoshop to help reclaim that ideal exposure.
A Good Rule of Thumb When Adjusting Your Levels:
Those black mountains that represent the values in your photo should be bracketed by the black (dark values) and white (light values) sliders. So the first thing I do is close up any gaps there might be by positioning my sliders as shown above, so the sliders on the end each hug the edges of the data shown on the histogram. Then you can make slight adjustments in your dark, light and midtone values until you’ve achieved an exposure you’re happy with.
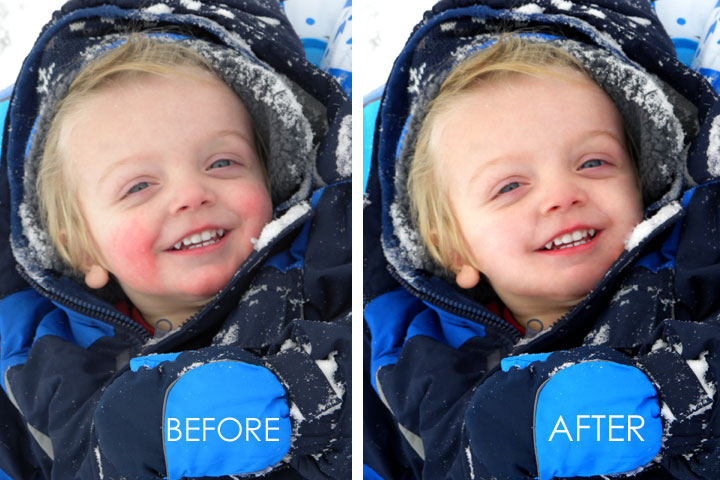
Don’t Be Cheeky!
Rosy cheeks aren’t all bad; I enjoy capturing winter’s soft kiss on my sons’ sweet little cheeks. But sometimes they can be distracting in a photo and considerably less flattering on adults. Consider using Photoshop’s Healing Brush to take the “bite” out your Winter photos.
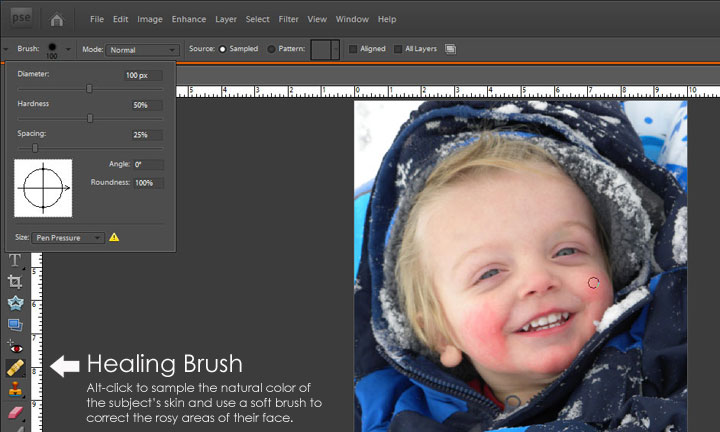
A few tips when working with the Healing Brush:
- When touching up sweet little rosy cheeks I like to use a large soft brush set at a hardness of 50%. This makes for great blend-ability and good coverage as well.
- I continue to re-sample (using ALT-click) as the shadows and highlights of my subjects face change.
- I like to dab at the area using several single clicks rather than painting the affected area as it gives me a little more control over my end results.

0 Comments