In certain situations it is possible to pre-plan our scrapbook layouts before any photos are snapped. Case in point, my husband, my son, my husband’s friend, and I recently attended an NFL football game. Even without any photos, I began the process of creating my layout ahead of the game, (pun intended!).
This same approach can easily be applied to other fall events such as apple picking, a pumpkin patch visit or Halloween trick-or-treating.
There’s a French expression mise en place that translates to set in place. In the culinary world it means you have all your ingredients prepared and ready to go before you start cooking. This preplanning was my version of mise en place as applied to scrapbooking. And unlike cooking, I could be prepared both literally and figuratively – let me explain.
Product Decisions
I had purchased a football-themed Echo Park football-themed mini kit that I wanted to use. I pulled out the kit and quickly evaluated the papers and embellishments included. I noted that I would need to find an alphabet to use, as none was included.
Page Design Considerations
I knew I wanted to make a one-page layout with three or more photos. I looked through the Simple Scrapper Premium Membership Library for ideas, which in turn triggered some questions.
- Did I want to use both horizontal and vertical photos?
- Did I want my photos to be square or rectangular?
- Did I want to include a lot of journaling?
- Would some of my photos carry more weight than others?
Additionally, since I was planning to create a paper layout, rather than a digital one, I sought out templates/sketches to which I could easily add journaling printed on my computer printer. Since I don’t own a 12 x 12 printer, I would need to be able to print onto a letter-size piece of paper.
As I perused the template library, I noticed that I was bookmarking templates with three to five photos in which one of the photos was larger than the others to give it emphasis.
Photo Checklist
I created a checklist of photos that I’d like to make sure we took. I knew that with the camera we would be taking into the stadium, I wasn’t going to be able to truly capture the action on the field.
- Signage of the stadium – up close and from a distance
- Group shot with the stadium signage or the field in the background
- Up close photos of my husband, his friend and/or our son
Titlework + Journaling
Deciding on a title is always one of my sticking points when it comes to finishing a layout. Since I’d need to find an alphabet to use, I decided to brainstorm some football-related titles such as Fourth and Goal or Touchdown Sunday. I turned to Peppermint Creative’s Football list for some inspiration. First and Ten and Football – it’s not just a game stuck out as possibilities. It also occurred to me that I could look at articles in both the Seattle Times and The New York Times on Monday morning after the game for headlines that might be applicable.
I started a Word file noting some key details to get my journaling started. By doing so, I would be able to focus on including snippets of conversation during the game, for example, with my journaling to take it beyond the basics. I could also use articles from the aforementioned newspapers in case I wanted to highlight game details.
Game Day
The one thing I didn’t plan on was my husband forgetting to put the battery back into the camera after recharging it so we wouldn’t run out of battery during the game! Rather than fret, we proceeded with taking photos with his iPhone camera. Luckily, when we arrived at the stadium, the rain hadn’t begun, so I had him take as many photos as possible beforehand. Additionally, the rain during the game was definitely part of the story I wanted to tell, although it wasn’t something I had considered ahead of time.
Post-Game Processing
After returning from the game, I downloaded the images and began processing them in Lightroom and Photoshop. I reviewed the templates I had considered and chose a freebie with five photos spots, with one emphasized.

July 25, 2012 Template from Take Two
Download the template with a Free Membership
My favorite photo was the one of me with my son, so I chose to enlarge it. I modified the template to include a vertical photo of me with my husband’s friend and my son, eliminating one photo from the template design. I also switched the photos to the left and the title/journaling to the right.
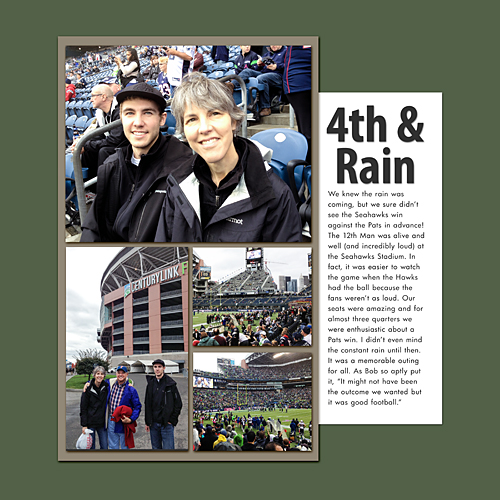
I played with the photos in Photoshop angling and overlapping them a bit, as well as moving the focal photo to the bottom. In doing so, I increased the photo sizes slightly. Before sending the photos to be printed, I drug them onto an empty canvas and realigned the photos.
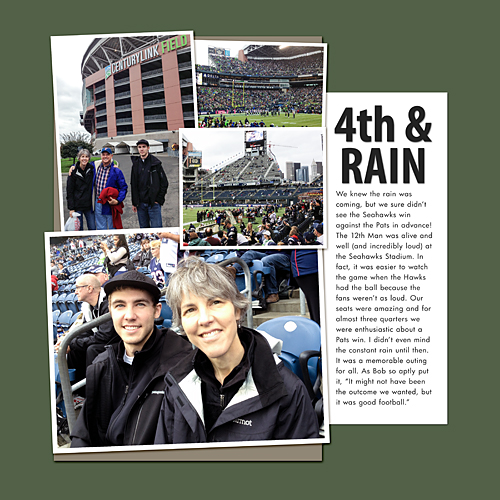
While I waited for the photos to be printed, I transferred the journaling onto a fresh canvas and printed it out onto patterned paper from the kit that I trimmed down to letter-size.
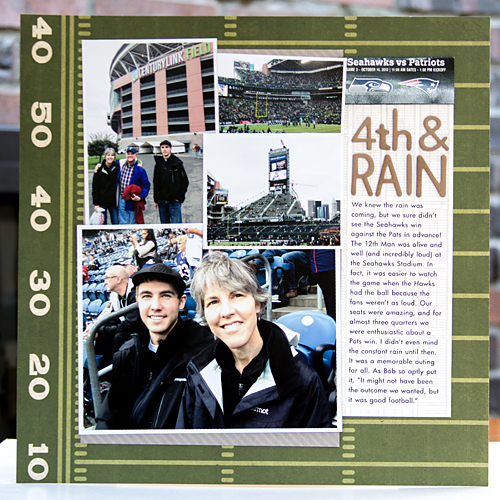
I looked at the Echo Park papers again and realized that the dark green one I’d mentally eliminated earlier was the one I would probably use, since the color provided contrast for the photos.
With my processed photos in hand, I began to assemble the layout. I trimmed the ticket down to include the team names and the date of the game.
I tried a few of the stickers from the kit on the layout but didn’t like how they looked. I don’t use a lot of embellishments as a rule, and frankly, the stickers just looked like an afterthought!
Post-Game Analysis
My favorite aspect from this exercise, and one I’ll use again, was creating the photo checklist. I think back on other activities and events for which I easily could have created a similar list. By having the list, even without the better camera, we were able to document our experience. I also liked having the papers chosen ahead of time – I was able to use up some of my stash and quickly assemble the layout.
Have you ever imagined a layout before you took the photos?
—
The Simple Scrapper Premium Membership offers shortcuts and support for maximizing your scrapbooking productivity. It is also on sale through October 31, 2012. Click here to get November and December for free.

0 Comments
Trackbacks/Pingbacks