
At the end of last year I was feeling burnt out on scrapbooking.
Don’t get me wrong, I love our community and this hobby. I’m in it for the long haul and am excited to see how our industry evolves in the decades to come. But after 8 years of creating (much of it on display for the world), I was tired of the anxiety I continued to feel.
I’m planning on digging into this further at the next Simple Scrapper Live, but I have some serious handwriting hang-ups.
While I do wholeheartedly believe in embracing imperfection, I have to be having what I call “a good handwriting day” to complete a scrapbook page. If I’m not, my brain and hands don’t work well enough together to make the letters.
This challenge has led to me creating less consistently than I really wanted. I have stories to tell and time keeps on passing.
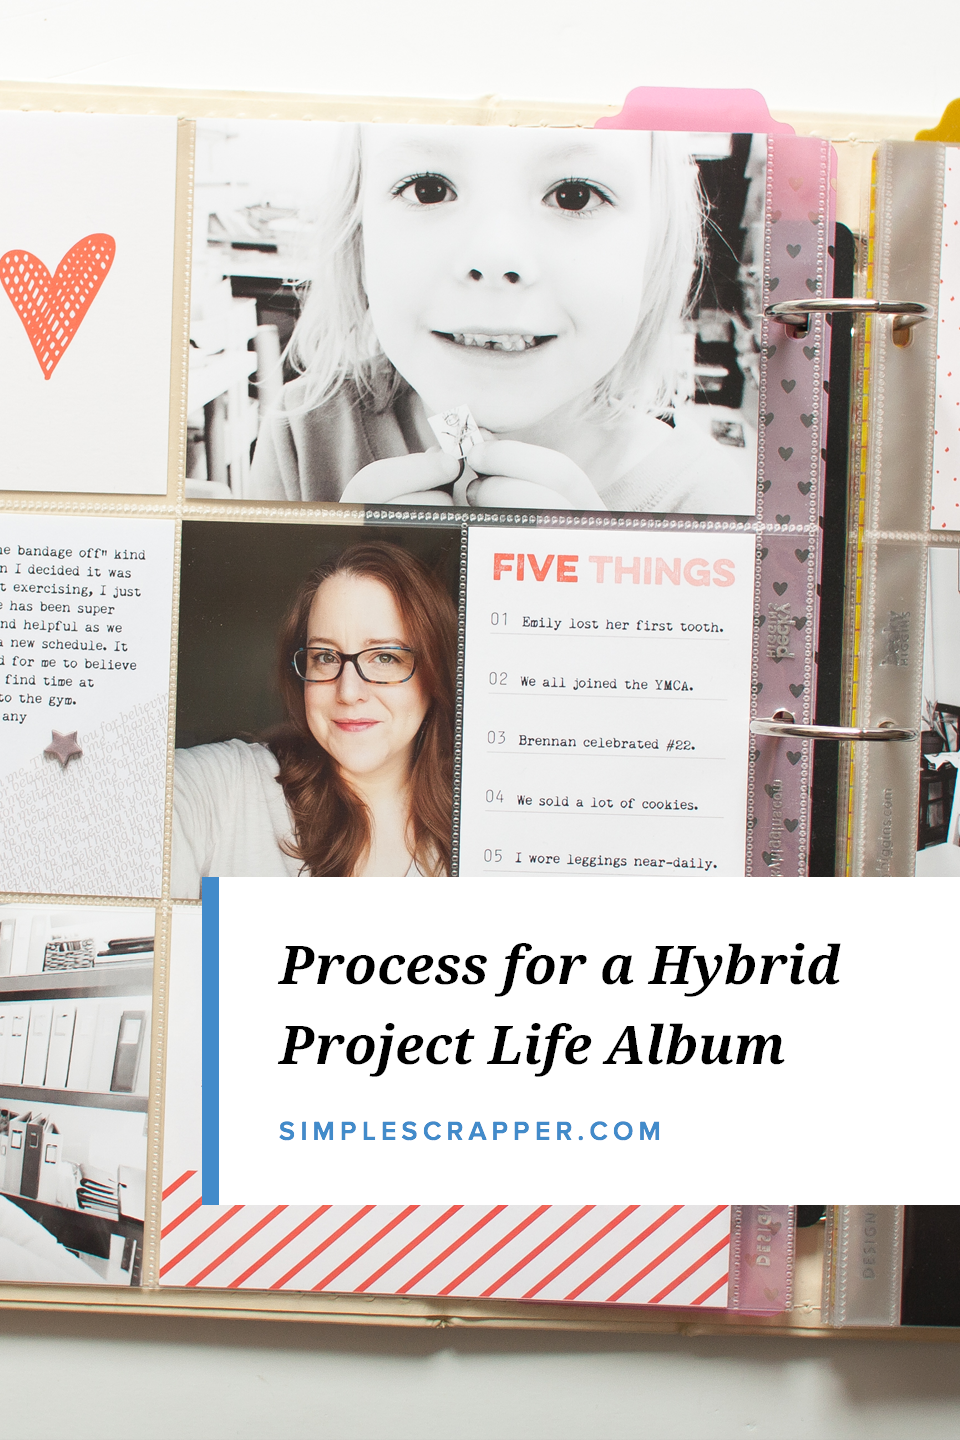
In this new post I’m sharing more about my decision to do hybrid Project Life pages in 2017 and the process I’m using to make spreads. I’m even including a peek at my first pages with this approach.
Why I Switched to Hybrid Project Life for 2017
In last week’s Simple Scrapper Live I shared the three reasons why hybrid scrapbooking makes sense for me in 2017. Hopefully my story above explains a little bit more about the anxiety I feel about handwriting and scrapbooking.
I’ve embedded the video here, in case you haven’t already watched the 15-minute segment.
Beyond that stress was also a need to switch things up for variety’s sake. I’d been doing pocket pages consistently since 2011, but only used my computer for the journaling a few times.
While I certainly don’t lack for Project Life supplies, when the idea for hybrid popped into my head I instantly felt relief. It just made sense in my current season of life.
How I Use Lightroom for Project Life
You don’t need to use Lightroom (or any photo management software) to do Project Life the hybrid way, but it is a key part of my process.
Step #1: Organize Assets
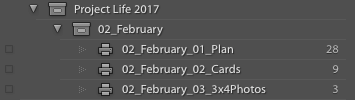
I started by creating a collection set for Project Life 2017 and another collection set for each month (02_February, for example). Then within that collection set I have three collections: Plan, Cards, 3×4 Photos. The Plan collection is my working folder of candidate images and supplies. Final choices get dragged to the appropriate collection for ease of printing (see Step #3).
Step #2: Plan Spread Design
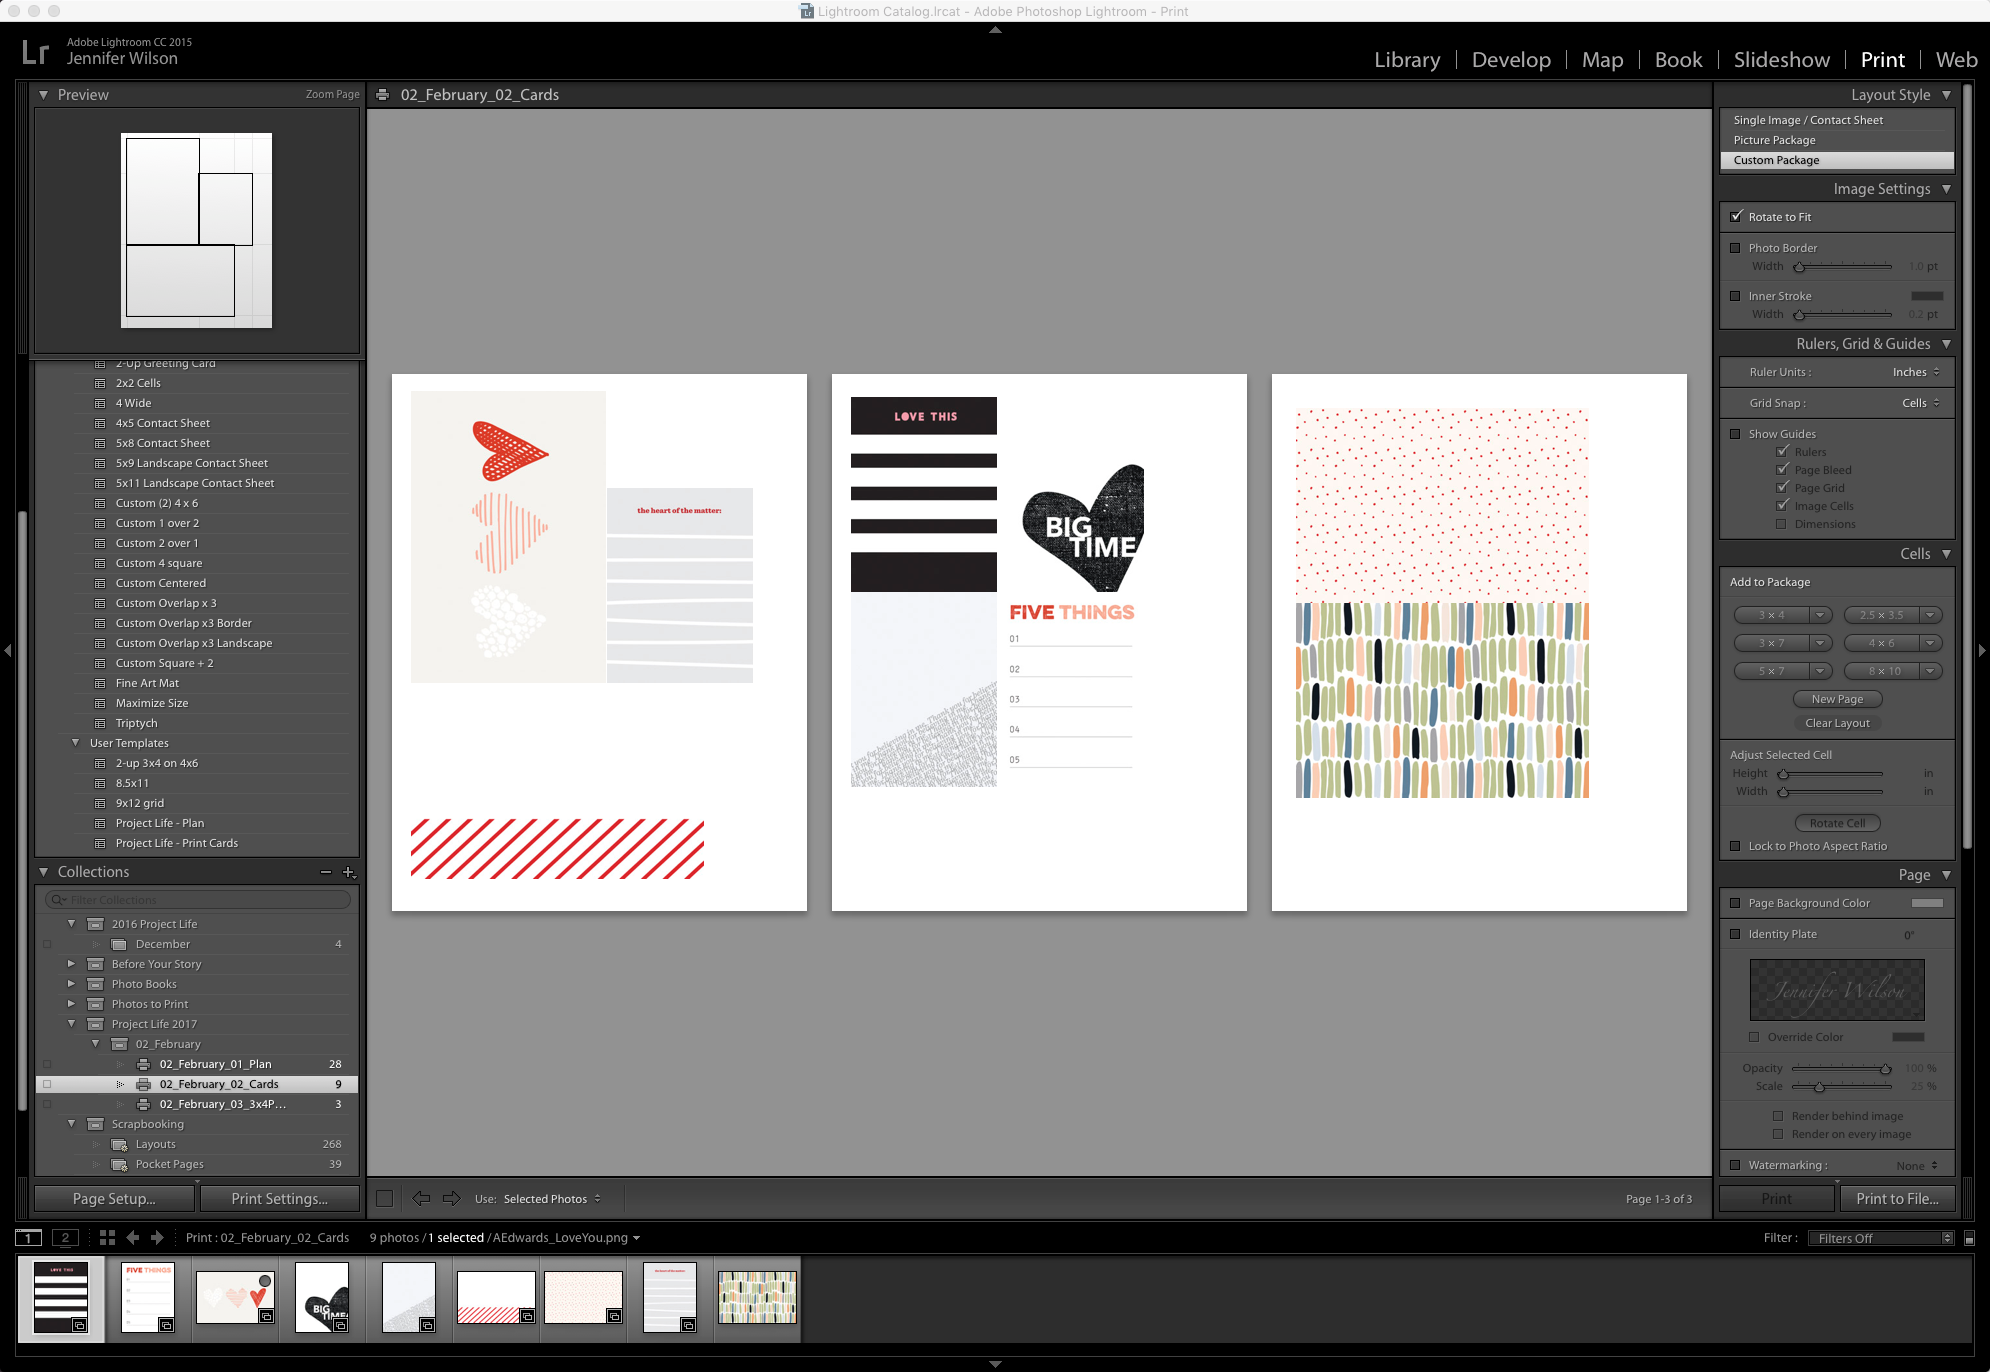
I set up a Lightroom print template that matched Project Life Design A so that I could visually plan out my spread.
Download Project Life Design A Lightroom print template.
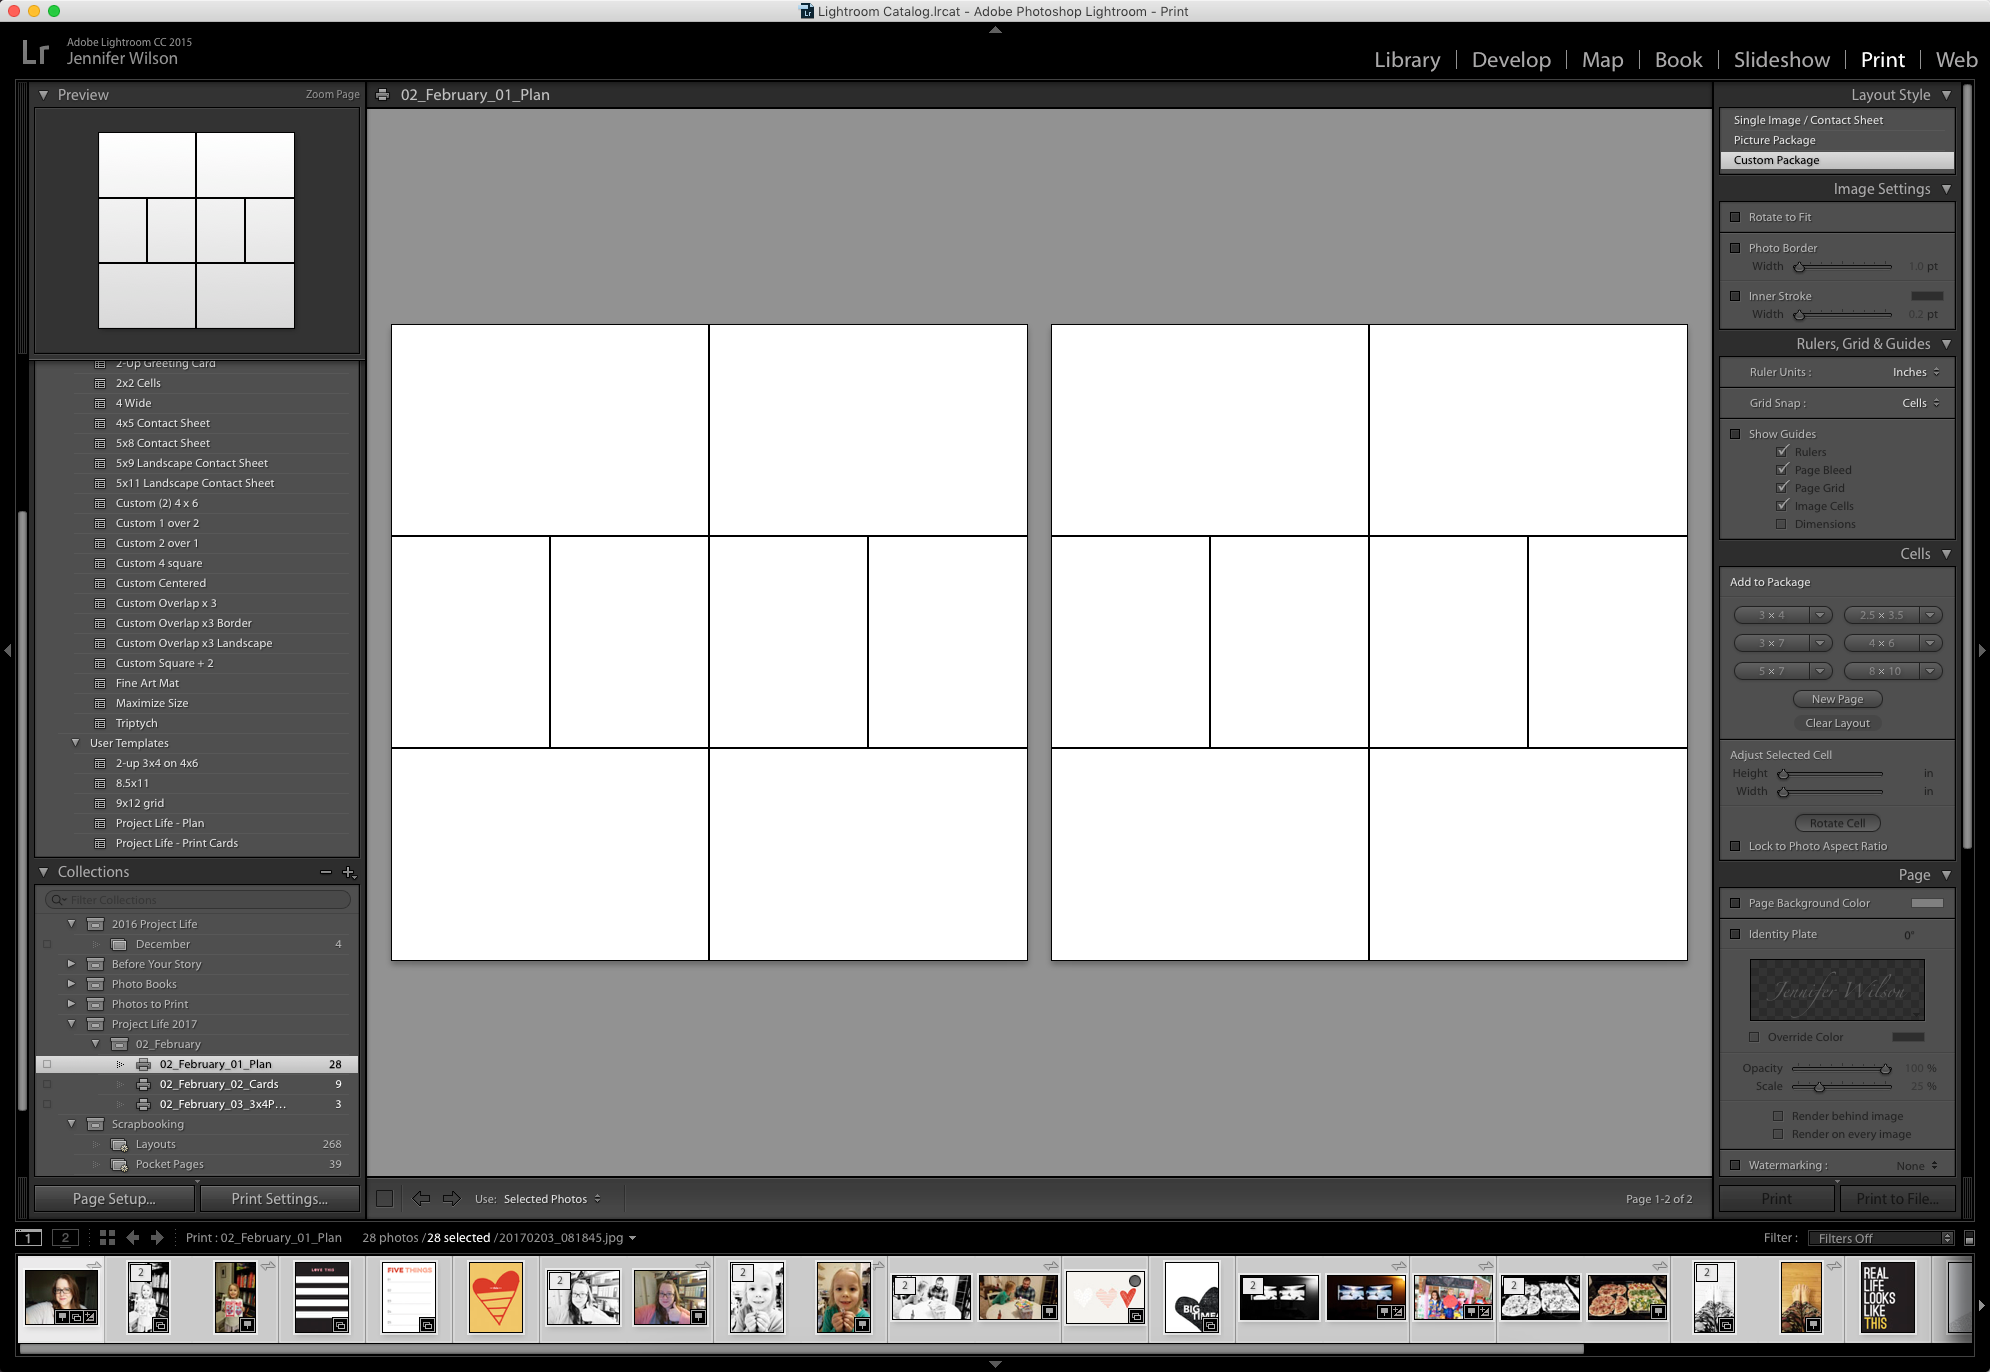
(click to enlarge)
I love being able to drag photos and supplies into each cell until I get a composition I’m happy with.
Step #3: Print Photos
With all of my assets selected, I started the process of printing. My 4×6 images were printed directly from Lightroom. My 3×4 images were collaged 2-up using a Lightroom print template and then printed from Photoshop.
Download 2-up 3×4 on 4×6 Lightroom print template.
Step #4: Export, Journal, and Print Cards
Printing of the journaling cards is similar, but requires one extra step. I started with a print template where I could collage my supplies onto an 8.5×11 canvas. These pages were exported as JPG and brought into Photoshop. I journaled directly on the large images before sending them to my printer.
Download Lightroom print template for 4×6 and 3×4 cards.
(click to enlarge)
Tool Tip: The photos were printed on Canon 4×6 Semi-Gloss Photo Paper Plus with my Canon PIXMA Pro-100. The journaling cards were printed on Epson Double-sided Premium Presentation Paper Matte and cut apart with my Rotatrim Paper Cutter.
My 2017 Project Life Pages (So Far)
We were well into 2017 when this approach finally clicked for me. I didn’t want to get started with a new album just because the calendar turned over to January, so I waited it out.
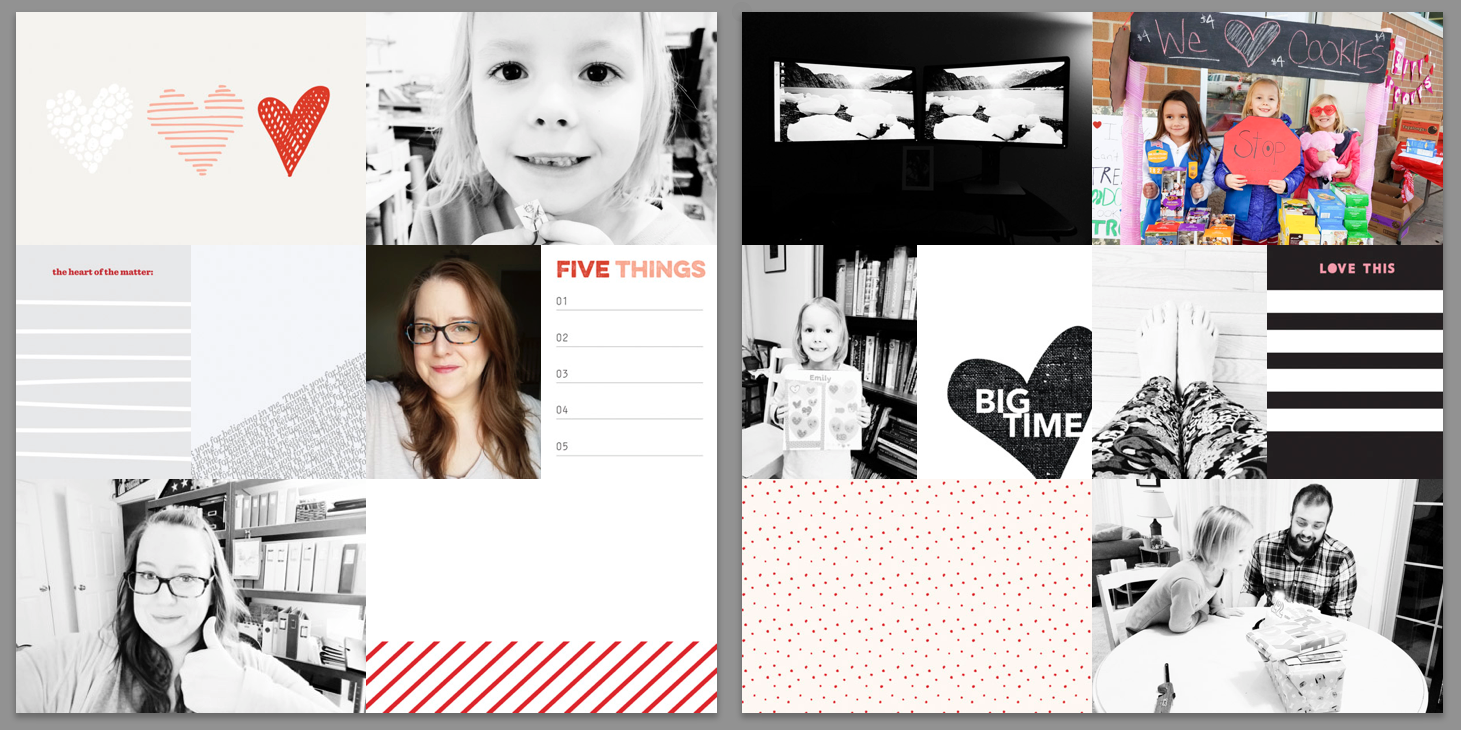
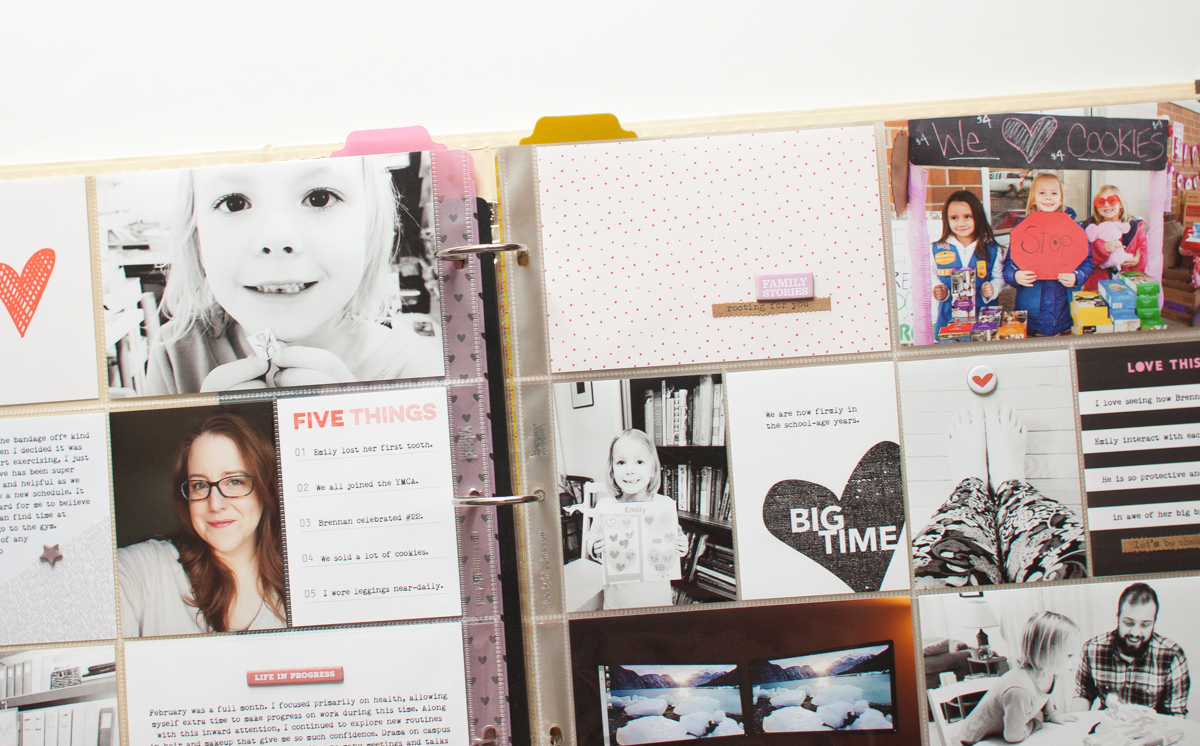
After seeing some beautiful hybrid pages on Instagram and thinking “I wish I could have that clean look.”, I took the plunge. This spread took about 90 minutes in total.
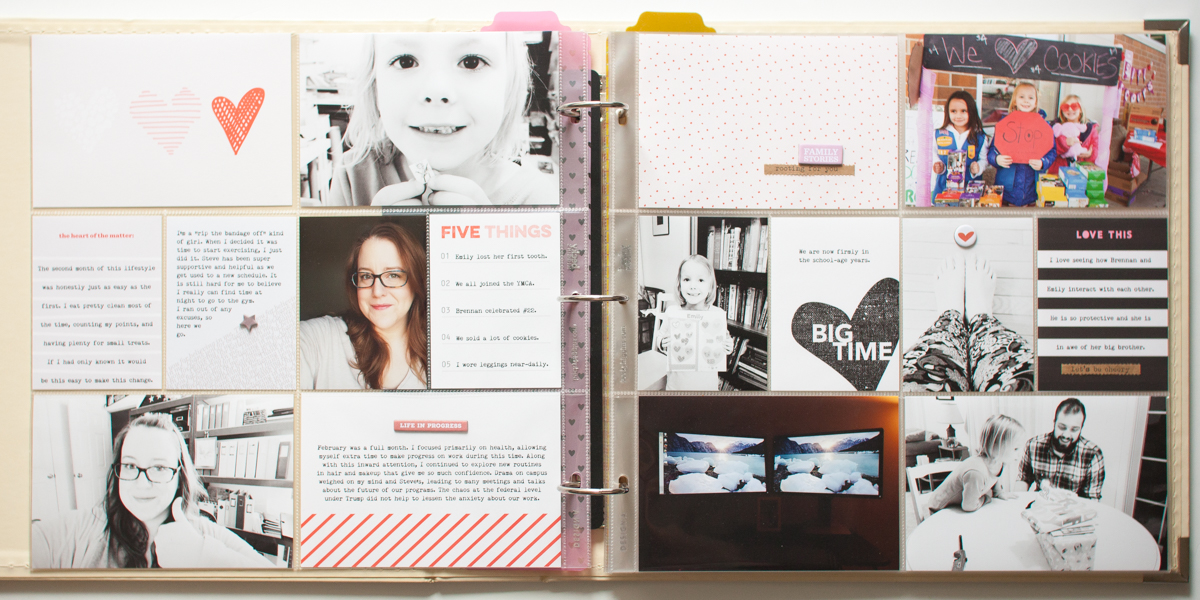
(click to enlarge)
I used five 4×6 photos and three 3×4 photos, along with three 4×6 cards and five 3×4 cards. All photos were from my phone and edited with Lightroom. The black and white images were also processed with RadLab using Milk and Cookies.
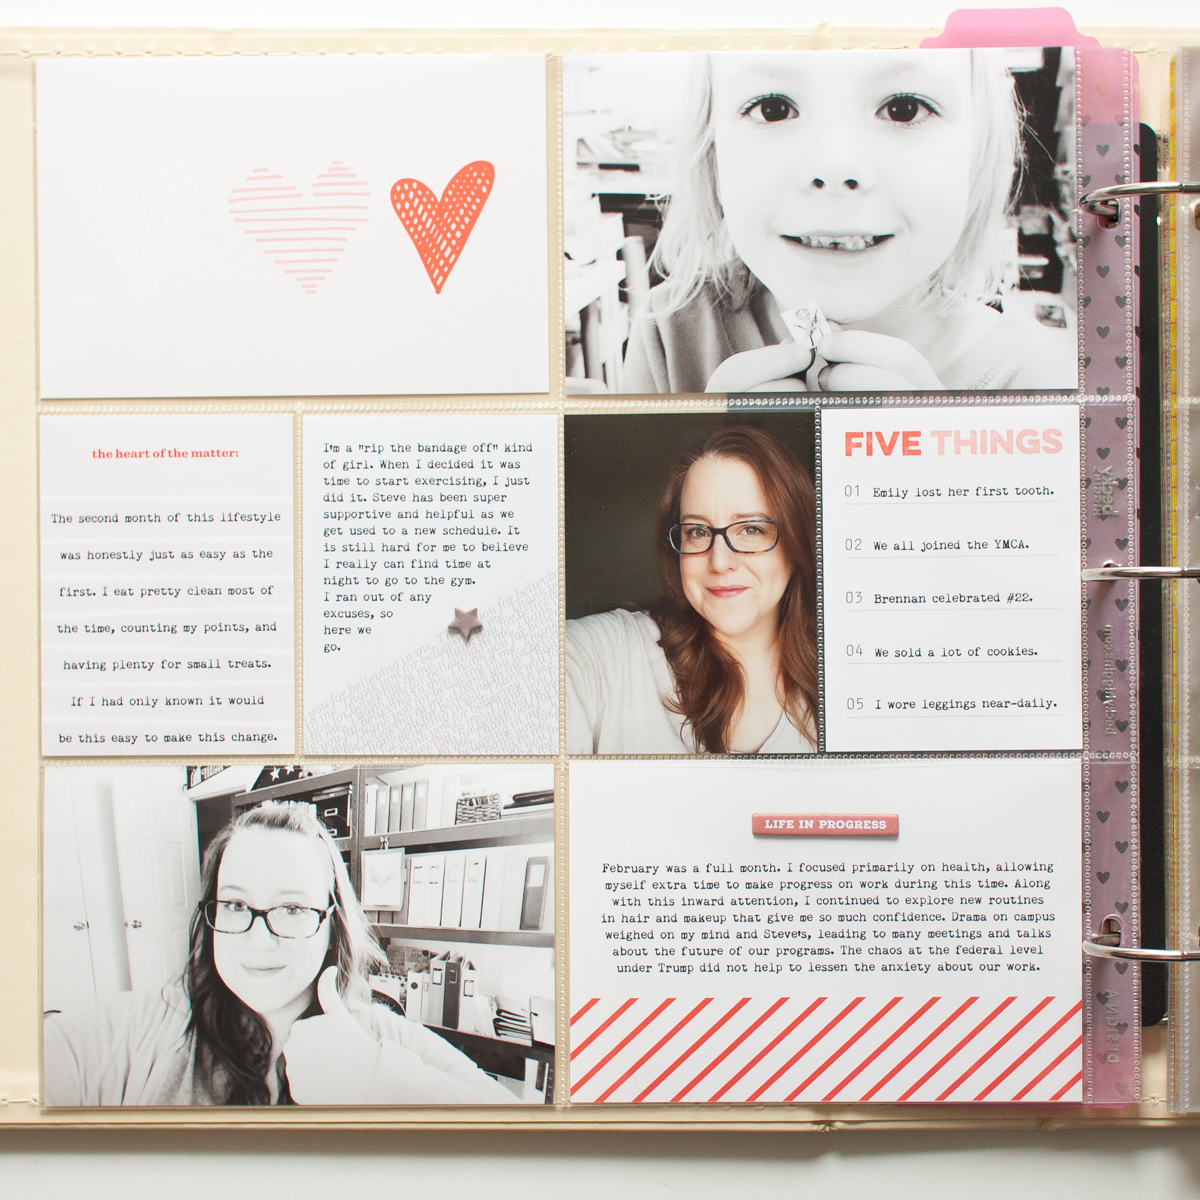
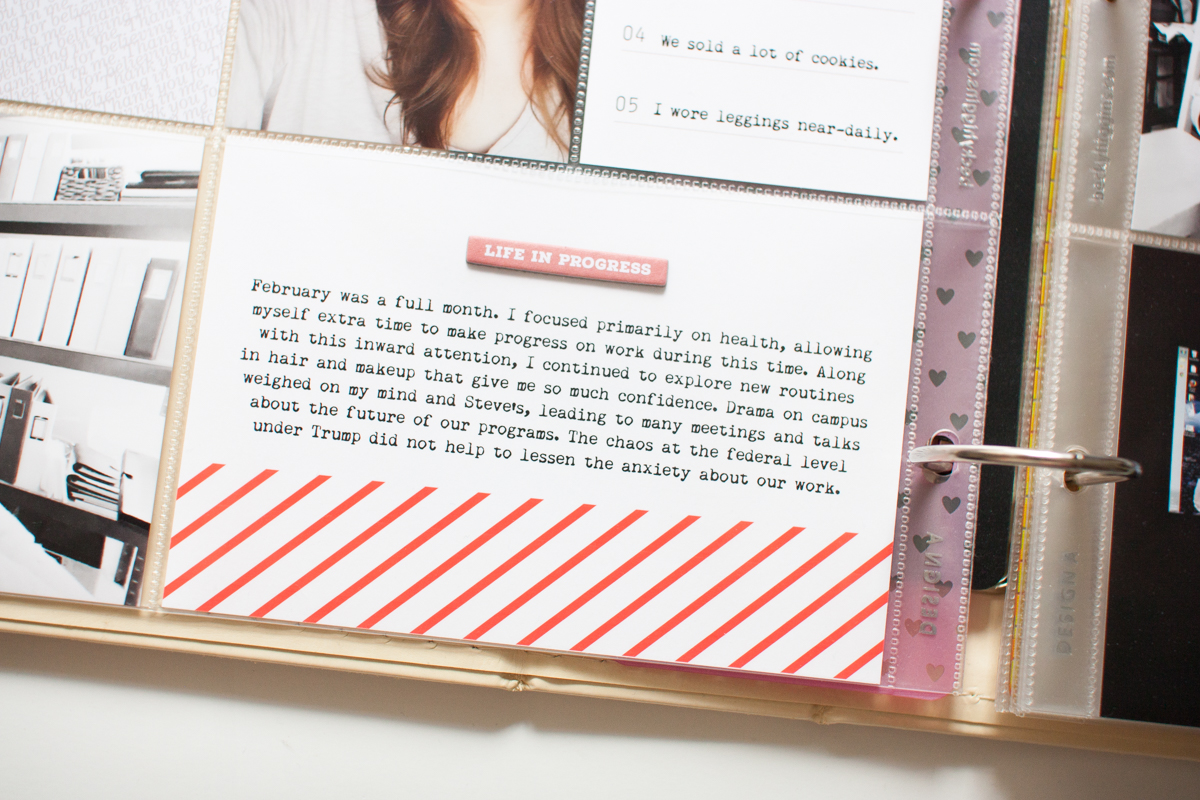
My biggest surprise with this new process was how much more I typed than I would write by hand. It took me back to my days of digital scrapbooking, where I admit, I told more involved stories.
My Ali Edwards Story Kit embellishments are some of my favorites, so being a scrapbooker, I had to add just a few to complete the page.
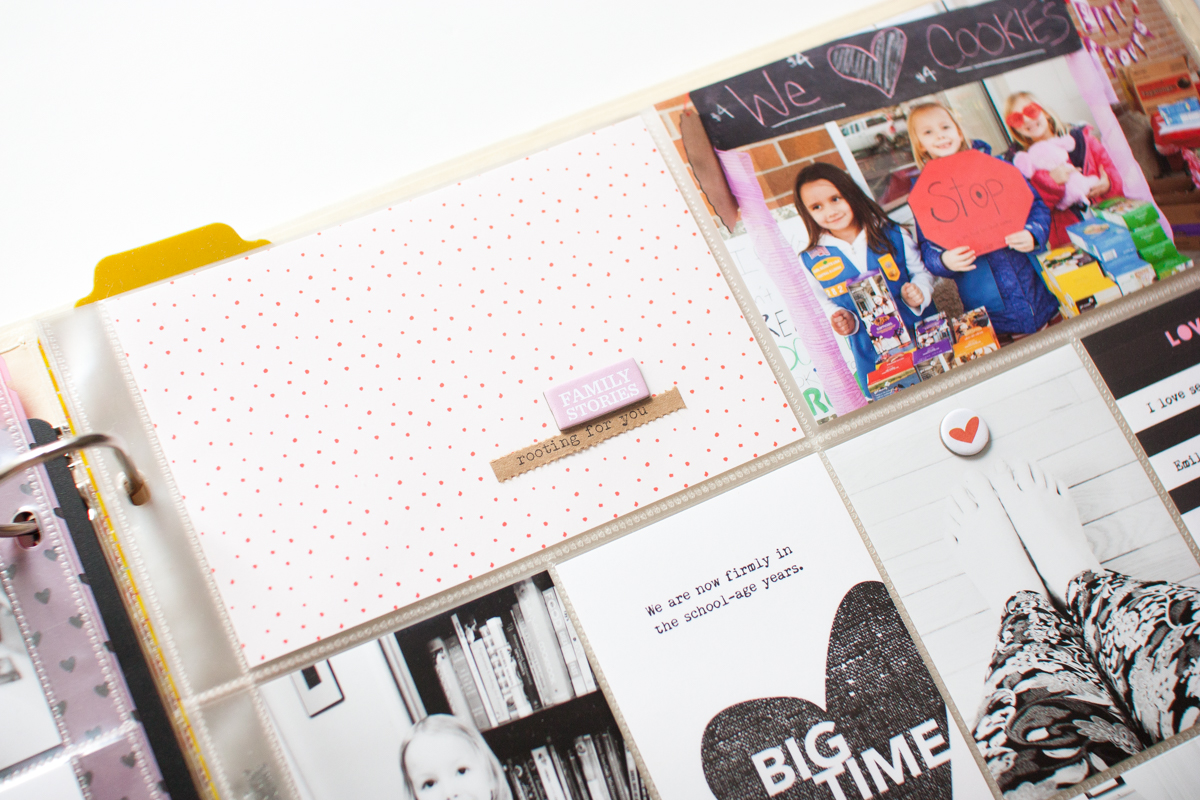
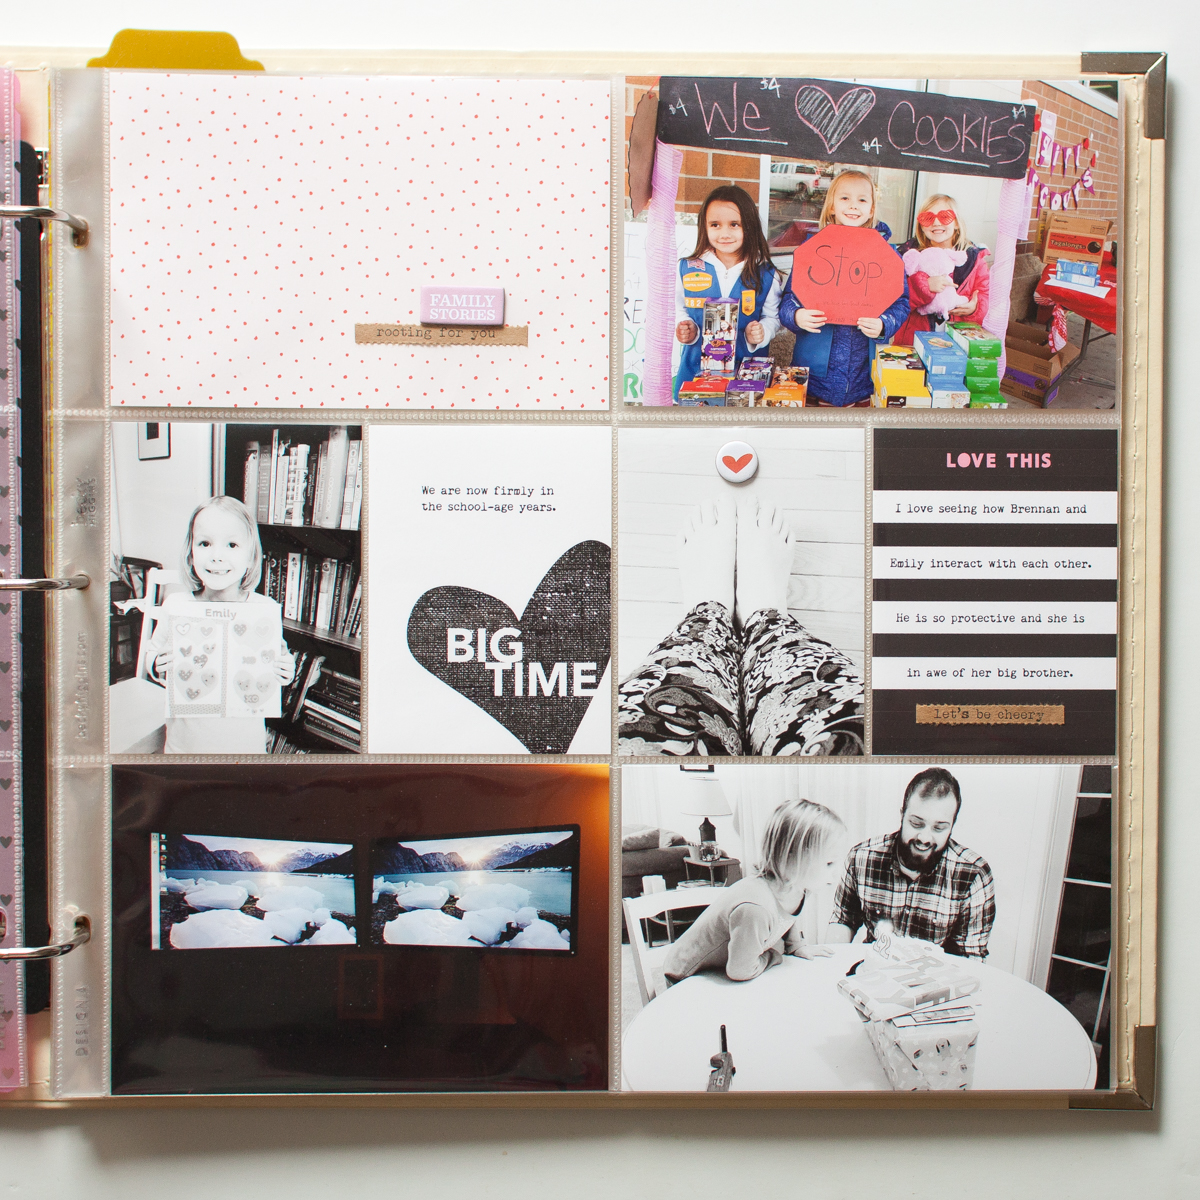
It was fun to be reminded that I only need my printer in order create “patterned paper” for scrapbooking. While doing that on a large scale is not efficient, for these small pocket it makes a ton of sense.

I see Project Life as a snapshot of our life through my eyes. My layouts will often include different perspectives, but these pages are more “mine” than the others. I’m thinking of including a selfie each month.
I’m just as guilty as anyone about making scrapbooking more complicated than it needs to me. The simplicity of this card in particular reminded me of what I value most in this hobby.
Questions to Ask about Hybrid Project Life
My approach to creating hybrid Project Life pages in 2017 won’t be for everyone. If you’re intrigued, however, it is my hope that you pause to ask yourself why. What might need to change so that you can feel even more excited to create? Here are some good questions:
- What reasons do you have to make a change?
- Do you have the technical skills or are you willing to learn?
- Is there an even-better option?

Thank you for the templates and sharing your approach. I love my project life albums but not always in my craft room scrapbooking. This approach will help me plan out ideas and pages and then when I am ready to scrap, everything will be done and all I have to do is hit print. Thanks again.
Great point Ann! This approach makes it easier to craft anywhere.
I’m not a digital scrapper (occasional hybrid scrapper), but I appreciate the fact you changed to suit your scrapbooking needs. Sometimes change is hard, but it turns out to be good! I wondered about your “good handwriting days” comment. It sounds like you might have dysgraphia. Have you always struggled with handwriting? The experts say TYPE IT!!! Whenever possible, just TYPE! Especially when composing long, or complicated writings. Sounds like you’ve made the right move.
No, I haven’t Rhonda. I actually won handwriting awards in school and practiced just for fun. I think it’s a symptom of spending most of my time typing and very little writing by hand. I have poor handwriting posture, so my hand cramps quickly, making it less likely that I will practice writing with any duration.
Also, I don’t have trouble with making lists for myself, so I think part of the problem is my brain skipping ahead when I’m journaling so I will leave out letters or whole words. To help with that sometimes I write my journaling first on scratch paper so I don’t have to think about what I am going to say.
Yes. Typing all the time! Like watching too much tv and not reading enough. Great idea to write out your journaling first. I need to do that. I get impatient and sometimes run out of room. Have a great week, Jennifer!
This year I’ve totally changed how I do PL. I’m using a combination of the PL App, physical PL, and 12×12 layouts. I love mixing it up and not being locked into a certain format.
Emily, it sounds like you have found the perfect combination for yourself!
Just wanted to point out that some libraries make lynda.com available to their patrons as well so you might have access at your local library!
Alissa, I did not know that! Thanks for the heads up!
Hello, I stumbled onto your website because of the keyword “hybrid.” I’ve discovered my own type of hybrid scrapbooking this year as well that I thought I would share with you and your readers I discovered it a little out of necessity because I had a fast-approaching deadline (although self-imposed because I didn’t HAVE to do it, I WANTED to do it) to complete an album of my son’s Boy Scouting career in time for his Eagle Court of Honor. Because I often had many photos for a given event, but didn’t want to scrap every picture, my solution was to combine traditional scrapbooking with Project Life pages. For example, for a particular event, I would have a traditionally scrapped page on the left and then a PL page on the right, usually a 6-photo landscape page, but not always. If the event warrants more photos then when you turn the PL page over, there are 6 more photos, or whatever PL page configuration I’ve chosen to use, and on the right side is another traditionally scrapped page. If more photos are desired to chronicle the event, I can add another PL page between the 2 traditional pages or even another traditionally scrapped page in the middle of it all. Hope this helps someone.
Thanks for walking through your process! Digital scrapbooking can seem so overwhelming and although I don’t think I’m ready for a full plunge into digitally scrapbooking all of my pages, adding digital elements to photos or cards before printing is exciting to me. I think that I always feel a sense of disconnect from when I’m printing my photos for a project and wanting to scrapbook. The waiting time between sends me into a creative lull, but bringing in the digital element has revived the excitement and makes the wait worth it!